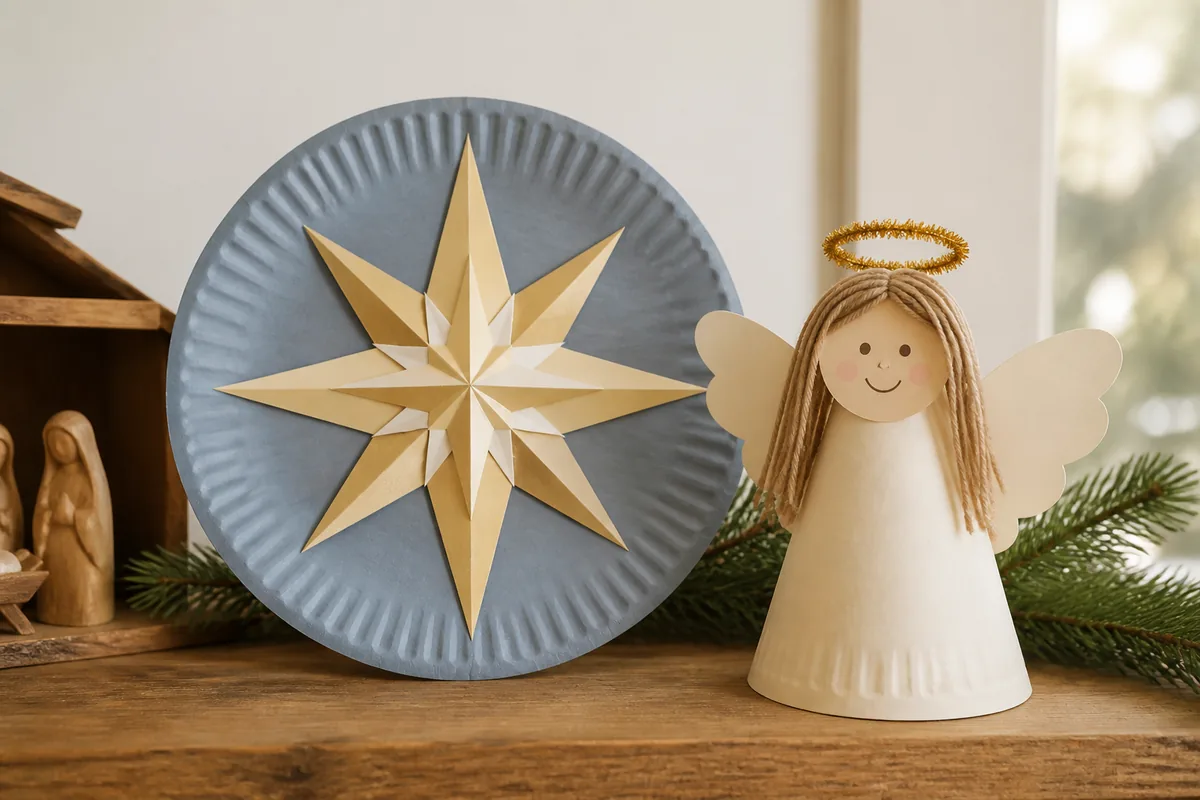
Use one painted paper plate for a layered eight-point star and a second plate for a cone-shaped angel with paper wings, yarn hair, and a halo.
Paper Plate Nativity Star and Angel Craft for Kids
Two plain paper plates can become a freestanding angel and a large layered star suitable for a nativity shelf, classroom display, or children’s Christmas table. The construction is simple enough for ages six and up, while an adult handles the few cuts that require a craft knife or sharp scissors. Using paint before assembly keeps the shapes neat and prevents glue joints from becoming soggy.
Project at a glance
- Difficulty: Beginner
- Active time: 50–60 minutes
- Total time: 80–90 minutes including drying
- Yield: One layered star and one standing angel
- Supervision: Ages 6+; an adult makes knife, sharp-scissor, and staple cuts
Materials for one star and one angel
Gather two uncoated 9-inch white paper plates, one sheet each of warm-ivory and muted-gold cardstock, washable tempera paint, two medium paintbrushes, child-safe scissors, pencil, ruler, white school glue, low-tack tape, and a black fine-tip marker. For the angel, add a 2-inch wooden or paper ball for the head, six 8-inch strands of yarn for hair, and one 12-inch gold pipe cleaner for the halo.
An adult will need sharp scissors or a craft knife, a cutting mat, and a stapler. Optional decorations include gold paper dots or a small amount of nontoxic glitter glue. Avoid loose sequins and tiny beads when crafting with children under three or in mixed-age groups.
Plan 20 minutes for painting, 30 minutes for drying, and 30–40 minutes for assembly. Protect the table and have children wear washable aprons.
Paint both plates first
Paint the front of one plate dusty blue for the star background. Paint both sides of the second plate warm ivory for the angel’s robe. Use thin coats so the plates do not buckle. If the paint pools, spread it toward the rim rather than adding more.
Dry the plates flat. A plate that feels cool or flexible is not fully dry and may tear during folding. While waiting, children can color the angel’s face on the ball with two eyes and a small smile. Keep the expression simple; wet marker can bleed under glue.
Build the layered nativity star
On muted-gold cardstock, draw a 7-inch vertical line and a 7-inch horizontal line crossing at their centers. Add four 5-inch diagonal rays between them. Connect the inner ends with gentle V shapes to create one eight-point star. An adult should cut this large star if the points are narrow.
Make a second eight-point star from warm-ivory cardstock, measuring 4½ inches from top point to bottom point. Let the child glue the smaller star in the center of the gold one. Apply glue in thin lines instead of coating the whole back, which can wrinkle cardstock.
Center the layered star on the dusty-blue plate and glue it down. Place a book on top with clean paper between the book and craft for five minutes. Add small gold paper dots around the star if desired, leaving the main shape uncluttered.
For hanging, an adult pierces two small holes ½ inch apart near the upper rim and threads a 12-inch cord through them. Tie the ends behind the plate. Skip the cord if the star will stand behind a tabletop nativity scene.
Shape a standing angel robe
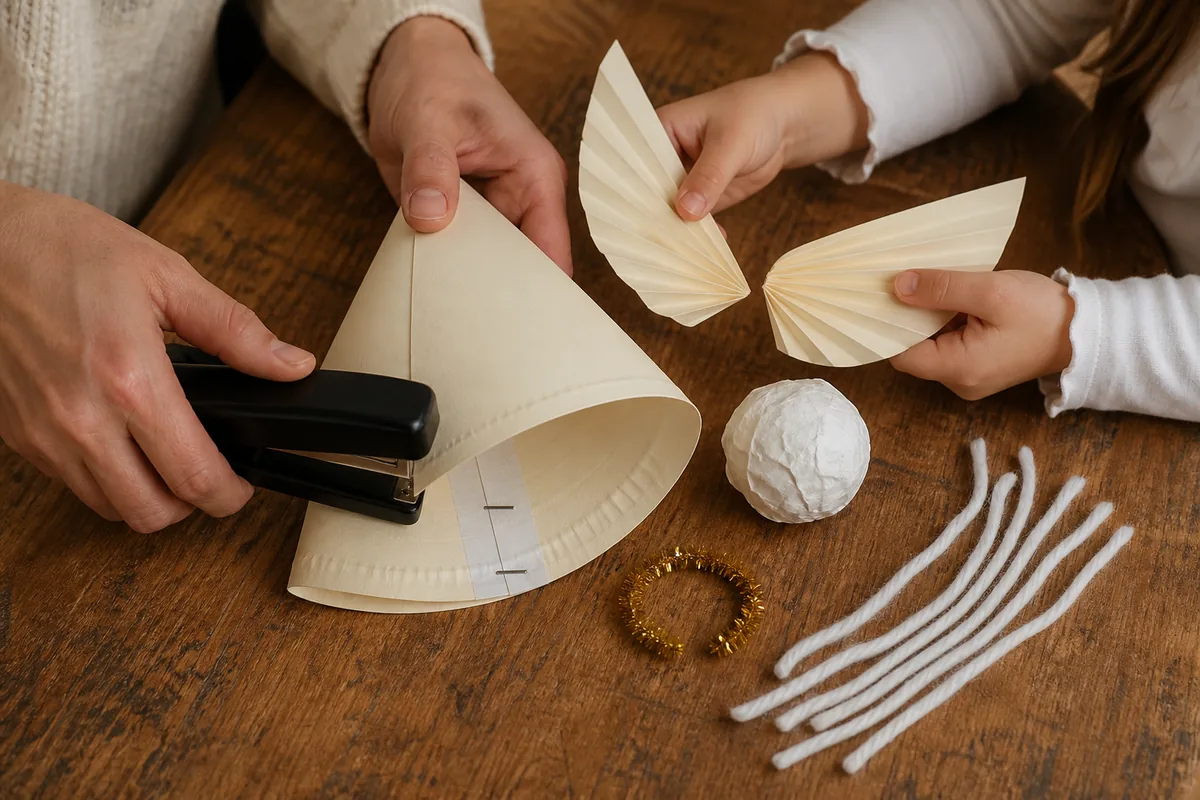
The angel uses the second plate as a cone. An adult cuts a straight line from the rim to the center. Overlap the cut edges until the plate forms a stable cone approximately 5 inches tall with a base about 4 inches wide. Tape the overlap temporarily inside, check that the cone stands level, then staple it twice. Cover staple legs inside with tape so fingers cannot catch on them.
Glue the prepared head to the cone’s top opening. If the opening is too wide, crumple a small piece of scrap paper inside as support. White school glue needs time to hold; rest the angel against a cup until dry rather than switching to hot glue around children.
Add wings, hair, and halo
Fold the warm-ivory cardstock in half and draw one wing 4 inches high and 2½ inches wide with the inner edge on the fold. Cut through both layers and open the shape into a symmetrical pair of wings. Children can draw three simple feather lines on each side.
Glue the wings to the back of the cone, about 1 inch below the head. Hold with low-tack tape while drying. Arrange the yarn strands over the head, glue them in place, and trim only after checking both sides.
Form the pipe cleaner into a 2½-inch circle with a 3-inch stem. An adult twists the join and bends any sharp end inward. Tape the stem securely inside the back of the cone. The halo should sit above the head without touching the child’s face during handling.
Display and troubleshoot
Place the angel beside a tabletop nativity and hang or prop the star behind it. Keep paper crafts away from real candles, fireplaces, heaters, and hot bulbs.
If the angel tips, widen the cone slightly or tape a cardstock circle inside the base. If a painted plate curls, press it under books after it is completely dry. Store both pieces in a rigid box rather than flattening the cone; the angel’s robe will keep its shape for another Christmas.