Cut three open-back cardstock house shells with one-inch side returns, add vellum behind the windows, and illuminate them with battery LED tea lights.
Scandinavian Paper Village Tabletop Scene
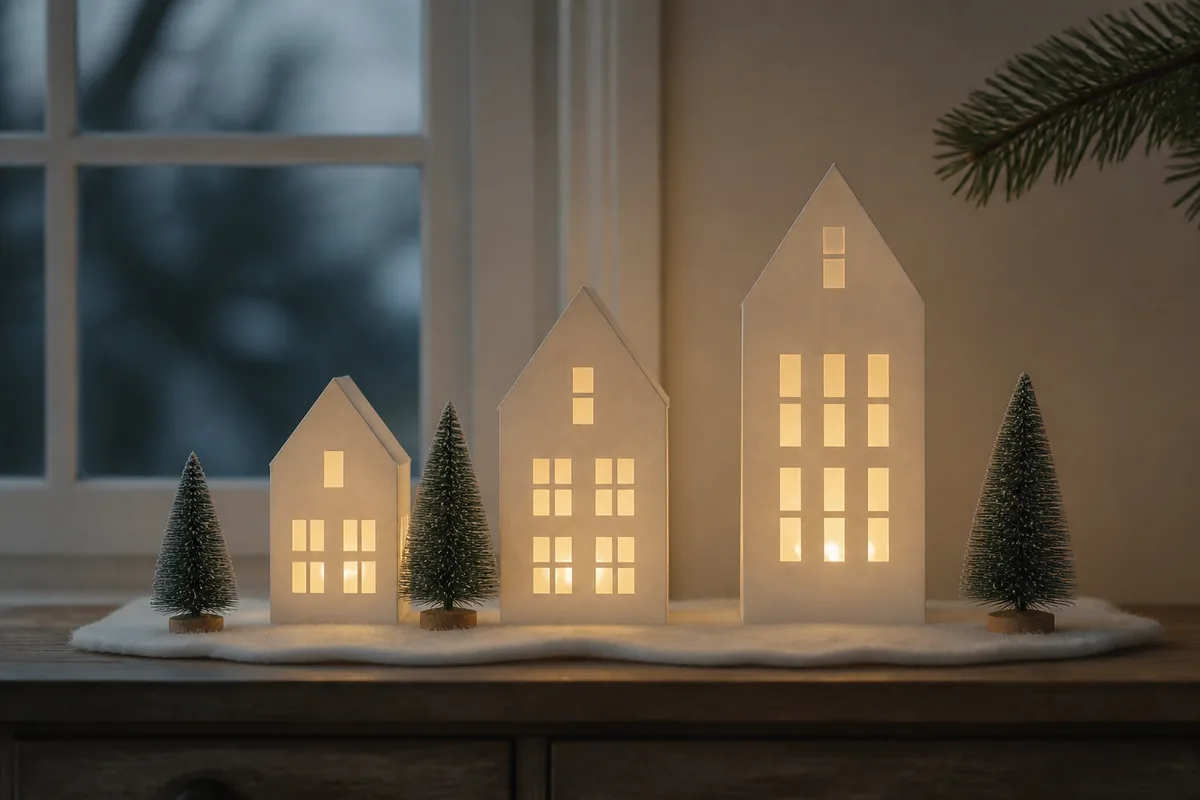
This paper Christmas village uses simple house shells rather than complicated architectural models. Three buildings in graduated heights create a convincing skyline, and removable vellum inserts soften the light from battery-powered tea lights. The finished arrangement fits on a 12-by-30-inch console, mantel, or sideboard while remaining deep enough to stand securely.
Project at a glance
- Difficulty: Intermediate
- Active time: About 2 hours
- Total time: 2½–3 hours including glue drying
- Yield: Three houses on a 12-by-30-inch display
- Supervision: Adults make all craft-knife cuts; battery LEDs only
Plan the three-house village
Make one small house 3 inches wide by 5 inches high, one medium house 4 by 7 inches, and one tall house 4½ by 9 inches. Each shell is open at the back and has 1-inch side returns that keep it upright. Use 80–100 lb cover cardstock; lighter paper buckles near window cutouts, while very heavy board is difficult to score cleanly.
For the village, gather four 12-by-12-inch sheets of warm-white cardstock, one sheet of translucent vellum, white acid-free PVA craft glue, low-tack painter’s tape, and three battery LED tea lights. Tools include a metal ruler, pencil, cutting mat, craft knife with a fresh blade, scissors, bone folder, and scoring tool. An adult should make all knife cuts. Never place a real candle behind paper.
Allow about two hours for measuring, cutting, and assembly, plus drying time. The project is intermediate because accurate scoring and window cutting determine whether the houses stand straight.
Draw each house shell
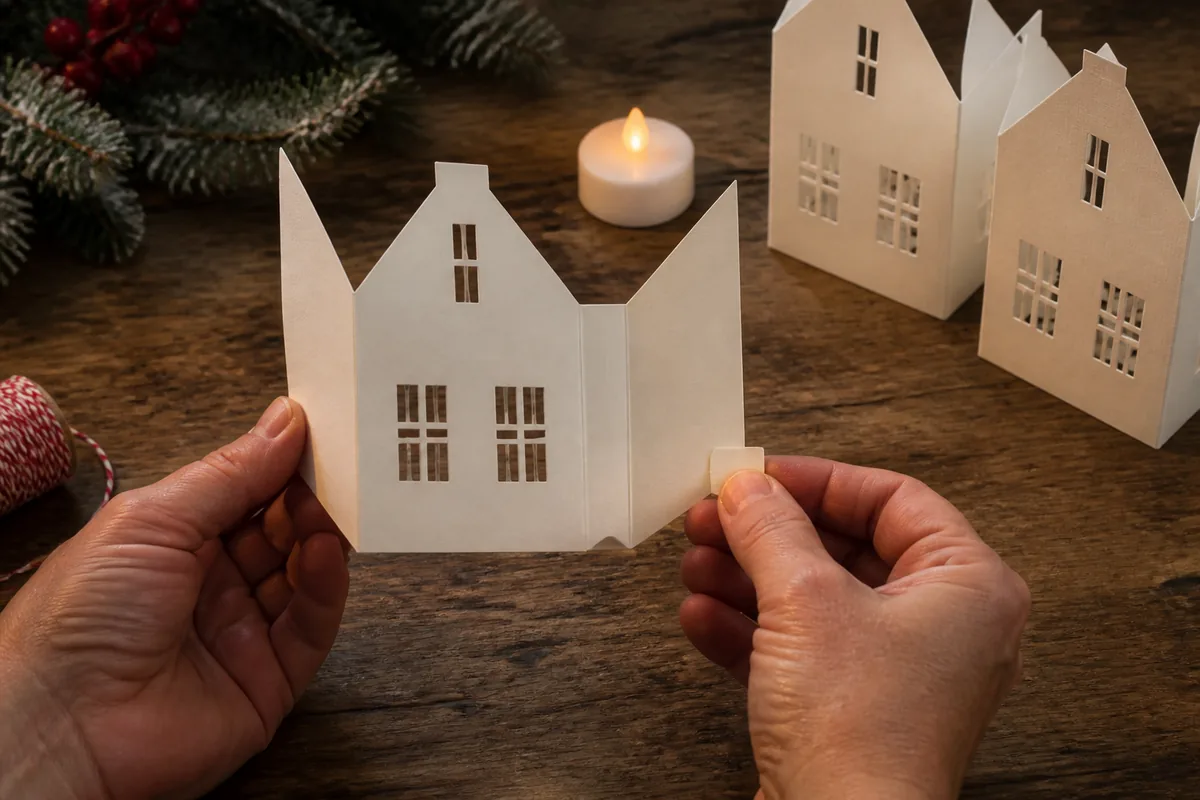
For each building, draw one continuous piece composed of a 1-inch left return, the front wall, a 1-inch right return, and a ½-inch glue tab. The wall height measurement ends at the eaves. Add a centered roof triangle above the front wall; a triangle 2 inches high suits the small house, 2½ inches the medium, and 3 inches the tall house.
Draw a door approximately ¾ inch wide by 1½ inches high. Keep windows at least ½ inch from every outside edge and ⅜ inch from one another so narrow paper bridges do not tear. Rectangular windows between ½ and ¾ inch wide are easier to cut than tiny decorative panes. For a calm Scandinavian look, vary the window arrangement but repeat one shape across all three houses.
Before cutting cardstock, make the smallest house from ordinary printer paper. Fold the side returns and stand it up. This quick model catches incorrect widths and helps confirm that the roofline suits the intended shelf.
Cut windows and score the folds
Work on the cutting mat. Use the metal ruler and craft knife to cut the outer shell, door, and windows. Cut away from your supporting hand and make several light passes instead of forcing the blade through in one stroke. Replace the blade if corners begin to drag or feather.
Score the vertical lines between the side returns, front wall, and glue tab without cutting through the cardstock. Fold along each score with the bone folder. The drawn pencil lines should end up inside the house. Erase any marks that remain visible before assembly.
Cut a piece of vellum slightly smaller than each front wall. Apply a very narrow line of glue around the window openings on the inside, then place the vellum over them. Keep glue away from the visible window area, where it can dry cloudy. Weight the fronts beneath a clean book for 10 minutes.
Assemble freestanding houses
Fold both 1-inch returns toward the back at 90 degrees. Fold the ½-inch tab behind one return and glue it in place to make that side double-thick. Hold with low-tack tape until dry. The opposite return remains a single layer; together they create a shallow U-shaped shell that stands without a base.
If a house leans, first check whether both scored folds are truly square. Reinforce a weak return by gluing a ¾-inch-wide strip of cardstock inside it. Do not attach a paper roof: the open triangle silhouette is lighter visually and allows heat from LED units to escape.
Arrange and light the tabletop scene
Place the tallest house slightly off center, the medium house 2–3 inches away, and the smallest forward by about 1 inch. Overlap the buildings visually but leave enough room behind each one to reach its light. A narrow strip of white felt or heavy watercolor paper can define the “snow” and protect furniture.
Set one battery tea light at least 1 inch behind each vellum front. LEDs vary in brightness, so test them before final positioning; a warm-white light is gentler than blue-white. Keep battery compartments accessible and switch all lights off when the display is unattended.
Add only a few accents—three miniature bottlebrush trees, a paper star, or a short evergreen clipping in a separate vase. Loose fresh greenery should not touch the paper, because moisture and resin can stain it. Avoid scattering artificial snow near battery compartments or pets.
After Christmas, remove the lights and store the houses upright in a lidded box. Slip tissue between them to protect cut windows. Because the backs remain open, the shells can nest loosely, but do not flatten the scored corners; repeated folding weakens cardstock and prevents the village from standing square next season.