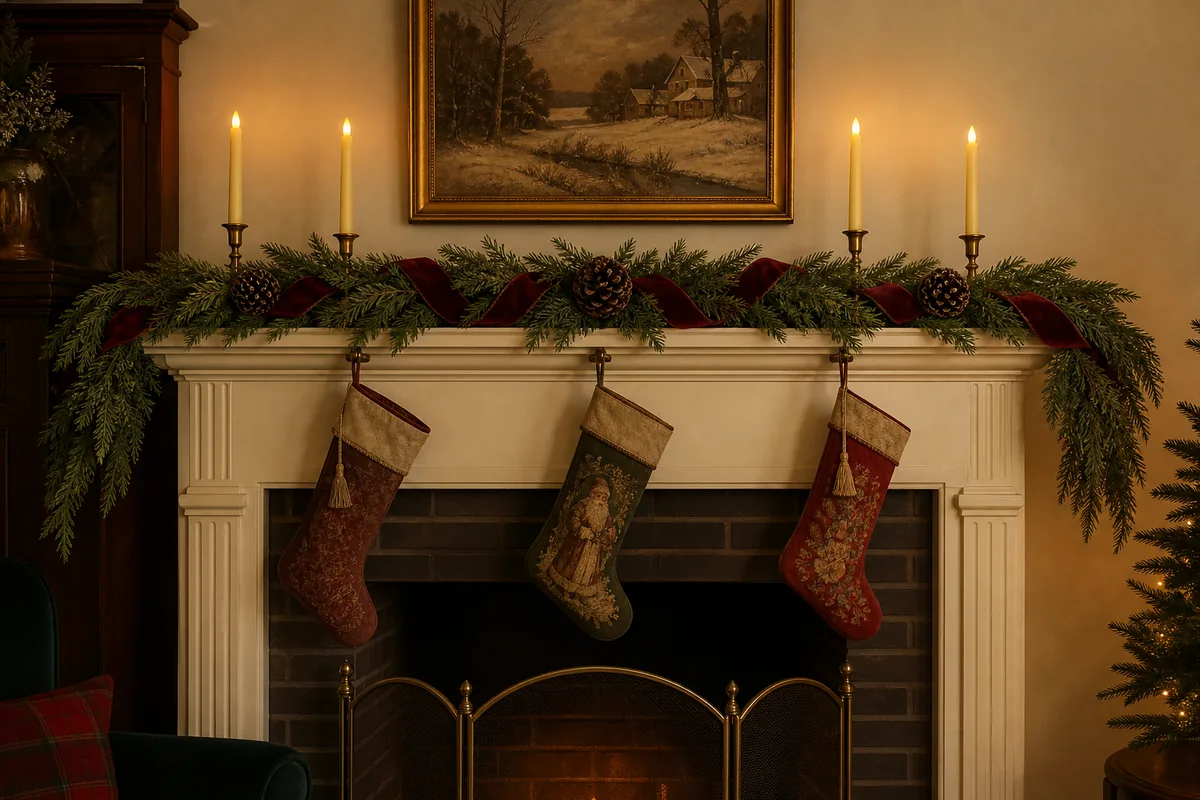
Build a 72-inch mixed-greenery garland on a rope base, secure it independently above a 60-inch mantel, then add ribbon, stockings, and battery candles with safe clearances.
Vintage Mantel Garland with Stockings and Candlelight
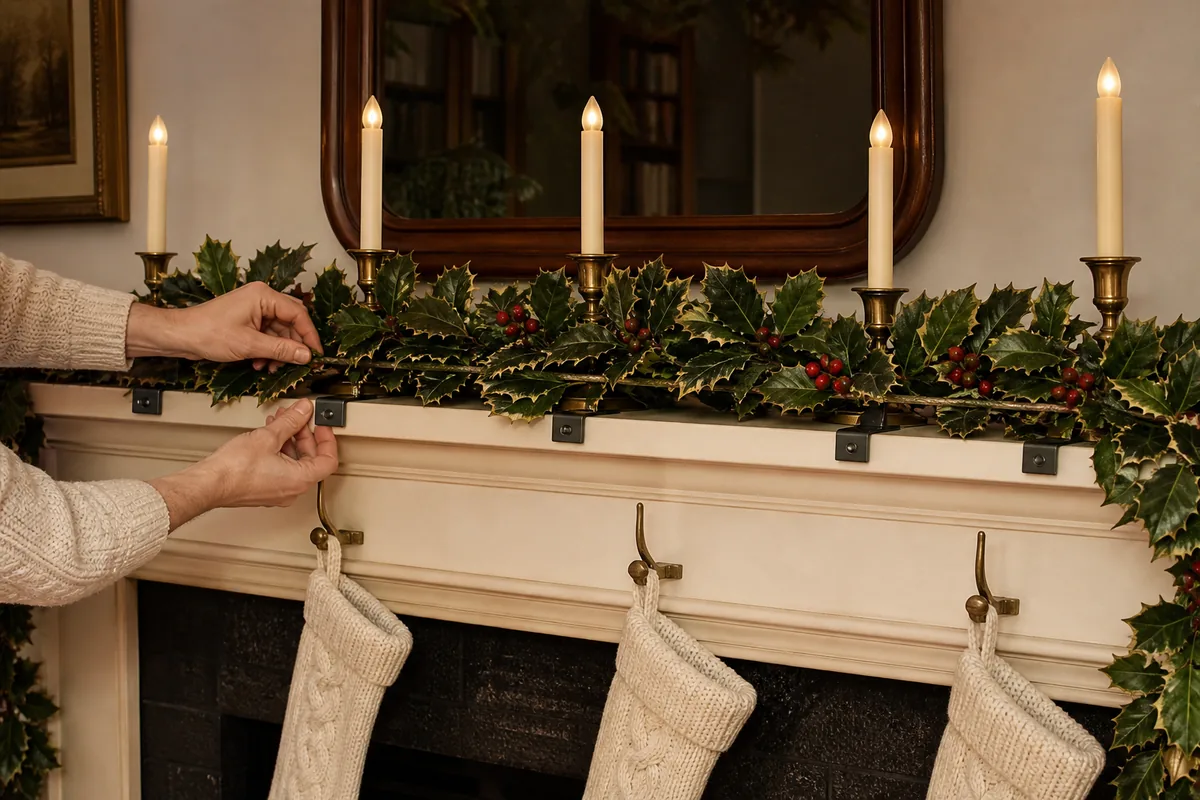
A generous mantel garland should look relaxed without relying on a precarious pile of branches. This design suits a 60-inch mantel: a 72-inch rope-based garland creates a modest 6-inch fall at each end, while five concealed attachment points carry the weight. Velvet ribbon, three stockings, and warm battery candles add a vintage mood without placing fabric or drying greenery near an open flame.
Project at a glance
- Difficulty: Intermediate
- Active time: About 90 minutes
- Total time: 90 minutes plus hook-curing time
- Yield: One 72-inch garland for a 60-inch mantel
- Supervision: Adults; verify rated supports and use flameless LEDs
Materials and measurements
Start with a 72-inch length of ⅜-inch natural rope. Gather 18–24 evergreen tips, each 10–16 inches long; combine fir, cedar, and pine for varied texture. Artificial greenery can be substituted in the same lengths. Add 22-gauge green paddle wire, three pinecones, 3 yards of 2½-inch wired velvet ribbon, and three stockings.
For installation, use five removable mantel hooks or clips whose combined rating comfortably exceeds the finished garland’s weight. Choose products specifically approved for the mantel surface and follow their curing time. Stockings require three separate rated holders or hooks; never hang loaded stockings from greenery or garland wire.
Use three or five flameless LED taper candles in stable holders, plus bypass pruners, wire cutters, gloves, ruler, and a bathroom or luggage scale. Allow 90 minutes for assembly and installation.
Build the garland on a rope base
Lay the rope on a protected floor or long table. Leave 6 inches bare at both ends for hanging. Make six loose greenery bundles, each containing one long structural tip, one medium filler tip, and one fine cedar or pine piece.
Place the first bundle with its stems pointing toward the rope’s center. Bind the stems to the rope with four tight paddle-wire wraps. Add the next bundle 6–8 inches inward, overlapping enough to hide the previous stems. Continue to the midpoint.
Work from the opposite end with three more bundles pointing toward the center. At the middle, overlap the final stems and cover the join with two shorter tips facing in opposite directions. Cut the wire with a 4-inch tail, twist it around the rope, and bend the end inward.
Lift the garland before decorating. If branches rotate underneath the rope, add another wire wrap through the woody stems. Fresh garland should feel flexible rather than brittle. Wear gloves and inspect greenery for insects before bringing it indoors.
Install five secure support points
Weigh the undecorated garland. Confirm that the selected hooks provide a generous safety margin, then clean and prepare the mantel surface exactly as their manufacturer directs. Install one support at the center, two approximately 14 inches from center, and two near the ends. Respect the full adhesive curing time before adding weight.
Set the rope—not individual branches—onto all five supports. Adjust the ends to fall evenly and gently shake the garland. Nothing should slide, roll forward, or obstruct a fireplace screen. If the mantel is shallow, use purpose-made clips rather than balancing the rope along the edge.
Add ribbon and natural details
Instead of winding ribbon tightly around the greenery, form three loose 8-inch loops and secure each to the rope with a short wire. Place one near the center and the others off balance for a collected, vintage appearance. Let two 14-inch tails fall where they will not cover a stocking hook or touch a candle.
Wire three pinecones individually and cluster them near one ribbon loop. Keep decorations concentrated so the greenery remains visible. Avoid dried orange slices on a working fireplace mantel; heat can overdry them and greenery even when flames are behind a screen.
Position stockings and battery candlelight
Install each stocking on its own rated holder, leaving at least 6 inches between fabric and the fireplace opening or any hot surface. Check the fireplace manufacturer’s required clearances, which take priority over decorative preferences. Remove stockings whenever the fireplace is operating, even if they appear far from the firebox.
Place battery LED tapers in weighted, nonflammable holders on open sections of the mantel. Keep at least 3 inches between an LED candle and greenery so the arrangement reads clearly and batteries remain accessible. Use candles with a timer to avoid leaving them on unnecessarily. Do not mix real candles into the display: dried needles, velvet ribbon, and hanging fabric make open flame an unacceptable risk.
Keep fresh greenery presentable
Fresh cut greenery indoors may dry within one to three weeks. Check it daily for brittle needles and remove any failing branch. Keep the room cool and the garland away from vents; do not spray water near electrical outlets, painted walls, stockings, or battery compartments.
At season’s end, lift the rope off as one piece before removing the cured hooks according to their instructions. Cut the wire, compost untreated greenery where permitted, and retain the rope, pinecones, ribbon, and LED candles. Store velvet loosely rolled rather than folded so it is ready to shape next year.